How to install and set up a MQL-system
1. Mounting location

Choose a location for installation that is protected but easily accessible for the machine operator. Often, this could be the machine’s control cabinet.
The assembly is carried out by means of two threaded screws, which should be secured with screw lock (e.g. Loctite) or self-locking nuts to prevent loosening during operation.
2. Filling the system

Fill the system with the supplied lubricant MSA-AME 507 and connect the air line (operating pressure 5 – 7 bar). We recommend adding a pressure gauge (not included in the scope of delivery) in the air line to ensure a constant operating pressure – 6 bar is optimal. Attention: The system’s fluid reservoir must never be empty. Always ensure a constant supply of fluid!
3. Electrical connection


Open the control cabinet of your machine tool and connect the electrical lines of the MQL-system to the motor relay in the control cabinet (contacts A1 and A2) In most cases this will be 24 volts AC or DC; the existing lines remain, so they are connected in parallel to those of the MQL-system. Make sure that the control voltage used to switch the motor relay matches the MQL-system’s. In rare cases, the motor relay of machine tools is switched with 120 V AC.
It is the customer’s responsibility to confirm voltage requirements so we can deliver the proper model for your machine.
4. Installation and alignment of the nozzle block

If installing the MQL-system on a bandsaw, it is preferable to disassemble the head block of your saw so that you have an easier job of cutting the two threads for the assembly of the system. Use screw lock (e.g. Loctite) to ensure a secure fit of the screws. The alignment of the nozzles – here using the example of a band saw – must be done so that the holes in the nozzle block point slightly over the cutting edge of the saw blade. The holes in the nozzle block are made at a 45 ° angle and thus direct the spray mist downwards against the cutting edge of the saw blade.
5. Laying the hoses
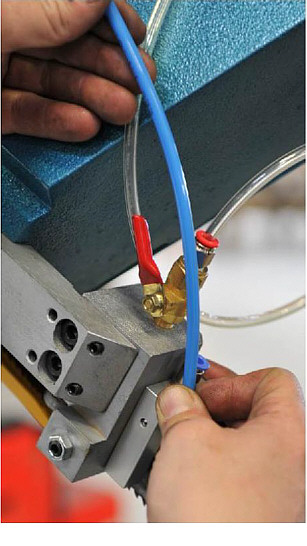
Route the hoses (combined air and oil hose) to the nozzle block. Make sure that the hoses are long enough to be able to make miter cuts and straight cuts. Remember that you are dealing with two hoses here and only shorten them at the end! If possible, route the hoses inside the saw arm. Make sure that they run freely and are not blocked. Finally, cut the hoses to the final dimension and attach them to the nozzle. Make sure that the hoses are not too short and that the saw can be moved to both outer positions. Proceed accordingly with other machine tools.
That’s it, your installation is complete! Next step is to set the MQL-system properly.
Setting the MQL-system
The required frequency and in particular the amount of liquid must be adapted to the specific place and use of the system. In general, the larger the surfaces of the tool and workpiece to be wetted, the greater the amount of liquid required. If you are unsure about the correct setting, get in touch with us – we will be happy to help you. Here are the instructions for mounting a medium-sized band saw.
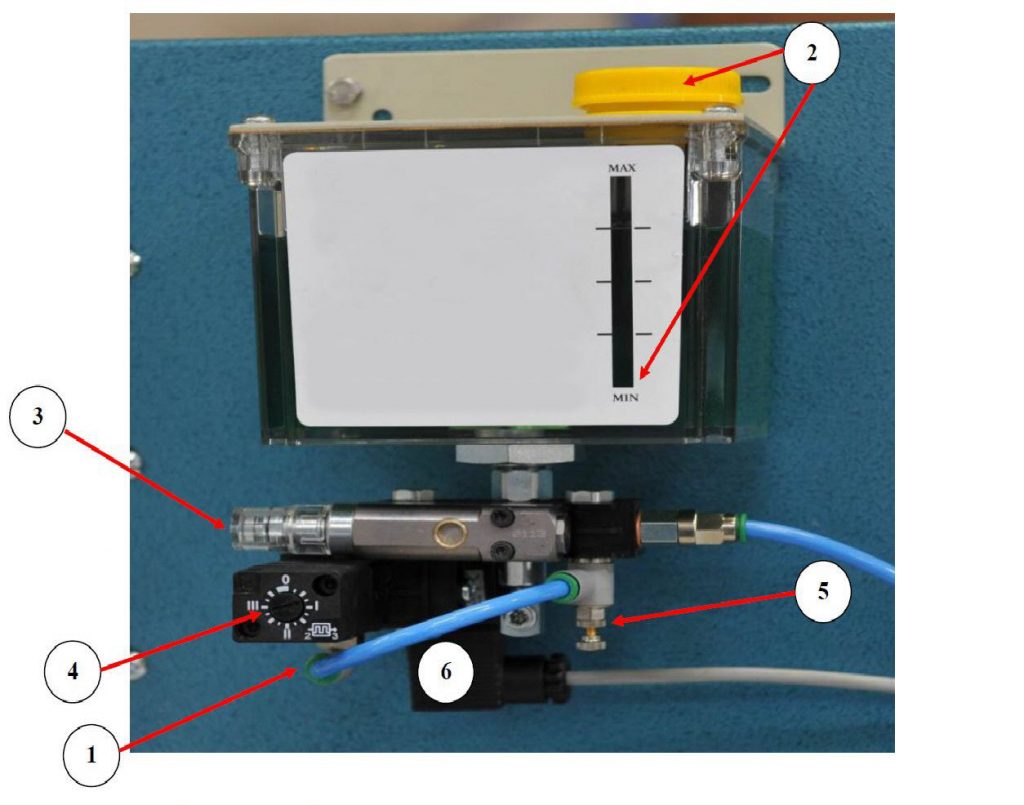
- air connection (8 mm, operating pressure 5 – 7 bar). We recommend installing a pressure gauge to ensure uniform atomization.
- filling MSA-AME 50 lubricant. The reservoir must not be run empty.
- setting the amount of liquid. Unscrew the screw fully counterclockwise and then 15 clicks in (4 clicks per revolution)
- pump activity frequency. Set this to approx. 0.9 so that the stamp receives an impulse approximately every two seconds.
- air supply to the nozzle. The setting is made so that the spray mist wets the tool safely and vigorously. Remember to tighten the lock nut.
- supply voltage coming from the machine tool, usually 24 VDC or 24 VAC or 120 VAC.
You can have the above assembly instructions for the MQL-system displayed as a PDF and save or print it out.
If you have any questions, problems or service, don’t hesitate to email us: contact@mql-system.com